
One easy way to connect with your RPi and get CLI access in any situation is to use its serial port – pins 8 and 10 in the header.
As its almost mission impossible to find laptop with serial port these days, I am using USB-serial interface. I also intend to keep USB-serial interface in the same box and connected with RPi so that I only need to bring USB cable (A-plug/B-plug) with me to connect.
Important note: RPi is using 3.3V logic levels! Do not use random USB-Serial interface/converter which typically use 5V!
For the example below you need following parts:
- Raspberry Pi model A, B or B+ (B+ first 26 pins same as A and B).
- ByVac BV103 USB-serial interface – it supports both 3.3v and 5v logic levels.
- USB cable: standard A plug – standard B blug. Borrow it from your printer or scanner.
- 3 wires to connect RPi and BV103. Ideally breadboard male to female cables for easy connection.
Before connecting, make sure that BV103 is set to 3.3V levels. Note the blue jumper position on BV103 board below.
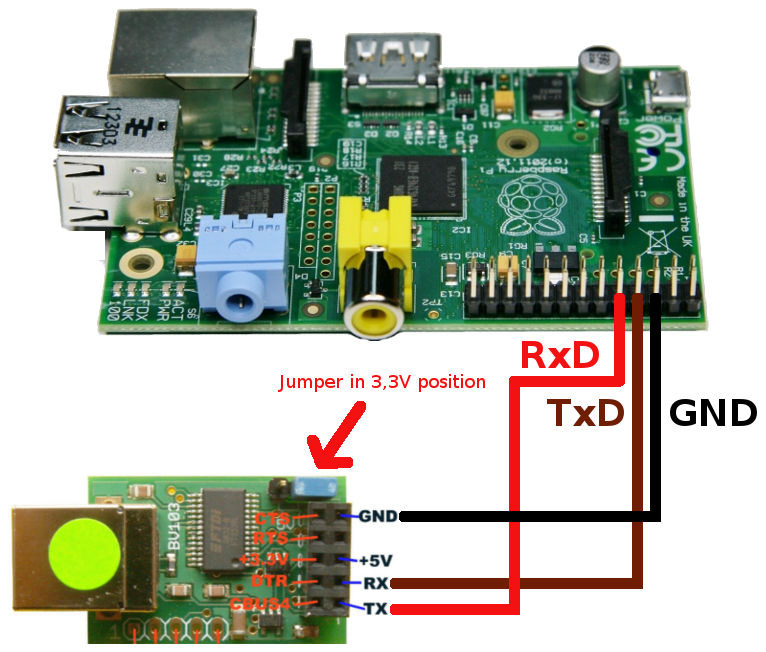
RPi and ByVac BV103 wiring diagram
In the picture above are 3 connections:
- RPi ground (PIN6) to BV103 ground (PIN9)
- RPi TxD (PIN8) to BV103 RxD (PIN3)
- RPi RxD (PIN10) to BV103 TxD (PIN1)
If you are still in doubt where to connect wires on RPi: Pins 6,8,10 are on main header third, fourth and fifth from the corner on the outer row which is closer to the PCB edge. There is no power connection as power is provided to USB-serial interface by the connected computer, not by RPi.
In real life it should look following, USB cable for connecting your computer is in the left:
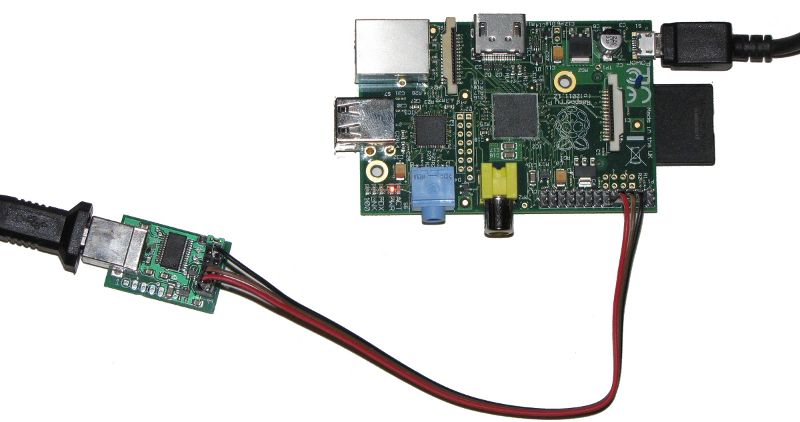
RPi and ByVac BV103 wiring photo
Next thing to do is to connect BV103 with your computer using USB cable. A-plug to your computer, B-plug to BV103. Your computer should now detect USB-serial interface, device name in Linux is by default /dev/ttyUSB0 or similar. If you using Linux, then for establishing serial connection you should install package minicom and run it as follows:
sudo minicom -b 115200 -D /dev/ttyUSB0
Where /dev/ttyUSB0 is USB-serial interface device name, 115200 is baudrate and sudo is needed if you don’t want to deal with /dev/ttyUSB0 device ownership issues.
If you encounter anomalies or it its not working, check minicom options, choose “8N1” for 8 data bits, no parity and 1 stop bit + set both hardware and software flow controls off.
If everything is done right, you should get login prompt as follows:
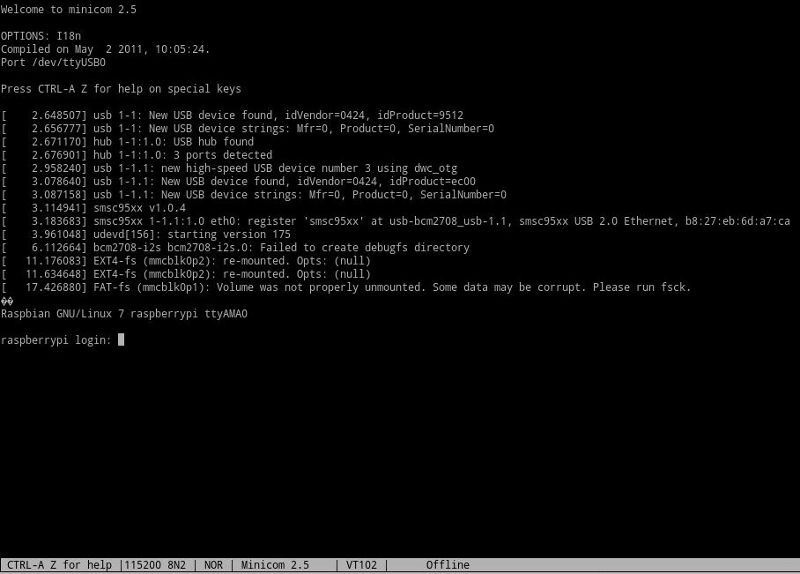
RPi serial connection with minicom
Windows lovers can find serial port numbers in their device manager and connect using teraterm, hyperterminal or whatever-terminal.
If needed, you can modify RPi serial port settings in /etc/inittab. Find following lines and I think no further explanation is needed.
#Spawn a getty on Raspberry Pi serial line
T0:23:respawn:/sbin/getty -L ttyAMA0 115200 vt100
If you found this useful, say thanks, click on some banners or donate, I can always use some beer money.