
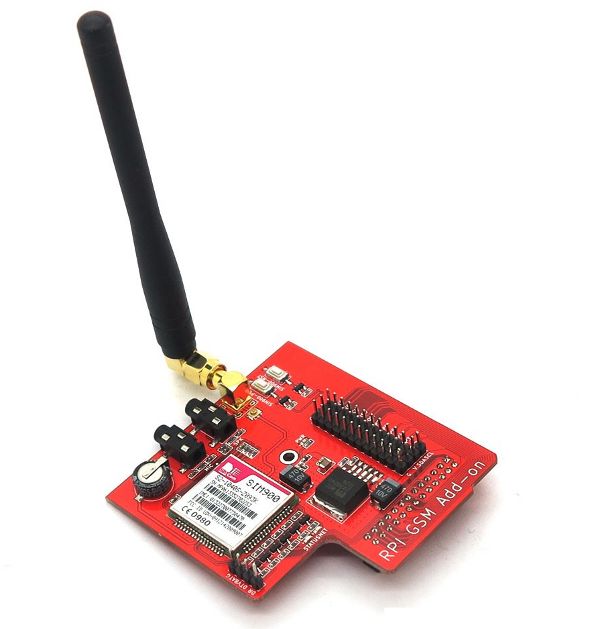
I recently got my hands on a product called Raspberry PI SIM900 GSM/GPRS Add-on …
… with a purpose to run command remotely on my RPi by calling in or in other words – dialing a RPi phonenumber on my cellphone. By running remote command you can open a latch of the trap door under your mother-in-law, open a gate or switch on coffee-maker without going to the kitchen – its up to you. It may be especially useful if combined with relays – you call to your RPi which runs a command which switches a relay which connects high voltage to the pole which is being marked by your neighbours annoying dog! Instructions (how to use relays) are here.
Library provided by this board manufacturer is written in C but it can be controlled also with existing commandline tools like mgetty as it is generally a modem accessible over serial connection.
Important note 1: Make sure that you have disabled PIN code prompt on the SIM card you intend to use. Take a spare phone and start it up with your selected SIM card. If it starts up without asking PIN code, you are set to go.
Important note 2: Make sure you are using power adapter which gives out at least 2 amps of 5V as it must power both your RPi and your GSM board.
So what you have to do on your Raspberry Pi first is of course connect the gsm board to your RPi. It’s straightforward connection – it matches the Raspberry Pi Model B header and is compatible also with a B+ although its looks a bit weird. Pictures about it are available in Itead Studio website , so I am not repeating them here.
Insert SIM card. If you stare the add-on board’s SIM card slot long enough, some contours of the SIM card start to emerge which will in turn help inserting SIM card in correct way. You may of course insert a SIM card before connecting GSM board with the RPi but no worries, it can be done also later. Don’t turn the GSM board on yet. It may be tempting as there is a button on the board but it will be useless in this point.
Now install mgetty package. That package provides also callback commandline tool for dialing out – follow that hint if you want to call out from your RPi. callback is especially useful if you want to make a proxy device for gate opening.
# sudo apt-get install mgetty
Next thing is to replace getty (which is by default put to RPi serial port) with mgetty and disable kernel message sending to that port.
1.a. Edit /etc/inittab , scroll to the end, comment out line with getty and add line with mgetty, like shown below. Don’t worry about mgetty parameters, serial port is enough, rest of the configuration will be put into mgetty config file.
#T0:23:respawn:/sbin/getty -L ttyAMA0 115200 vt100
T0:23:respawn:/sbin/mgetty /dev/ttyAMA
1.b. If you have newer distro with Systemd, read this: https://www.raspberrypi.org/forums/viewtopic.php?f=66&t=132542
I’ll put my own version here in some moment.
2. Edit /boot/cmdline.txt file and change line
dwc_otg.lpm_enable=0 console=ttyAMA0,115200 console=tty1 root=/dev/mmcblk0p2 rootfstype=ext4 elevator=deadline rootwait
…to following to free up ttyAMA0 port. You have to remove part shown above in bold.
dwc_otg.lpm_enable=0 console=tty1 root=/dev/mmcblk0p2 rootfstype=ext4 elevator=deadline rootwait
I believe you don’t want to keep pushing power button manually if you want to automate something? So its time to power on your GSM board without pressing the power-button on the board. It can be done with commands indicated below. If you want the GSM board to power on automatically on startup, you may put these commands to /etc/rc.local file just before line exit 0 (in which case you may omit sudo).
# sudo echo 17 > /sys/class/gpio/export
# sudo echo out > /sys/class/gpio/gpio17/direction
# sudo echo 1 > /sys/class/gpio/gpio17/value
Note that if you don’t turn on your GSM board or if you make configuration errors, mgetty will keep respawning and checking the serial port for modem which eventually may fill up logfile /var/log/mgetty/mg_ttyAMA0.log .
Keeping that in mind lets start with mgetty configuration. Edit /etc/mgetty/mgetty.config and add to the end of the file following:
 port ttyAMA0
   speed 9600
   post-init-chat "" ATH0 OK ATS0=0 OK AT+CLIP=1 OK
   rings 2
   answer-chat "" ATH0
   cnd-program /root/command.sh
This should do port-specific configuration and you should not worry about any other part of the mgetty.config file.
mgetty configuration entries explained:
port ttyAMA0 – specifies port name which is ttyAMA0 on RPi by default
speed 9600 – port speed, by default its 9600, as I don’t need faster connection I don’t care about the speed.
post-init-chat “” ATH0 OK ATS0=0 OK AT+CLIP=1 OK – this is an addition to default modem initialization where ATH0 hangs up all calls which may be in progress, ATS0 will disable automatic answering by the GSM modem, AT+CLIP=1 enables Caller ID so that you can choose which calls to answer and which ones not.
rings 2 – this is for mgetty to answer call after 2 rings. According to the mgetty manual, its minimum number of rings for Caller ID to work.
answer-chat “” ATH0 – this sets custom answer command, instead of usual ATA command it sends ATH0 which ends all calls. Your call will be rejected and you see on your phone that other party is BUSY. If you want to chat with your RPi and pay for the call you may want to do something differently.
cnd-program /root/command.sh – this tells mgetty to run command /root/command.sh just before answering (in this case rejecting) your call. Mgetty waits until that command is successfully finished before answering (rejecting) the call so better start something useful in background using command.sh and exit with code 0 if you want mgetty to answer (with BUSY in this case), exit with code 1 or do something else if you want phone to keep ringing.
This is almost all what is needed. You may now reboot your RPi and it should run your command.sh when you call in.
Unless you want somebody else to turn on your coffee-maker, you may want to use Caller ID to run commands on your Raspberry Pi only if it gets call from predefined number. For that you should pay attention to the /var/log/mgetty/mg_ttyAMA0.log – call in and make a note how it is displaying your phone number. Probably it will look like your number without international codes, + signs etc.
If you see how your phonenumber is given to mgetty, add it to /etc/mgetty/dialin.config followed by !all which denies all other calls which number does not match. So add something like this to the end of dialin.config:
# my cellphone
123456789
# my wifes extremely long phone number what I can bring as excuse why I am not calling her
127645343567890123456789009876567621736
# don't answer to anybody else
!all
Now you should prepare your scripts, for example following:
/root/command.sh – first script what mgetty runs. It just executes second one and exits to minimize delay in case you have chosen to hang up ASAP. $2 is the variable containing Caller ID (phone number), which is passed to second script.
#!/bin/bash

DATE=`date`
LOG="/var/log/incoming_calls"

echo "${DATE} from ${2}" >> ${LOG}

/root/command2.sh $2 > /dev/null 2>&1 &

# replace with exit 1 if you want mgetty not to answer the call - it just keeps ringing
exit 0
/root/command2.sh – secondary script which runs different commands for different callers in case you want it.
#!/bin/bash

LOG="/var/log/incoming_calls"

case "${1}" in
        "123456789")
        echo "Doing something for caller 123456789" >> ${LOG}
        ;;
        "1276453435678901234567890098765676") MC=0
        echo "Doing something for another allowed caller" >> ${LOG}
        ;;
        *)
        echo "Got number ${1} which did not match with predefined numbers but was allowed in dialin.config!" >> ${LOG}
        ;;
esac

exit 0
Now make shellscripts executable:
# sudo chmod 700 /root/command*.sh
Restart your Raspberry Pi, call in and check out for the log file /var/log/incoming_calls for the results. You may want to replace /bin/login with /usr/sbin/nologin in /etc/mgetty/login.config if you are really paranoid.
Commands and configs in this page were tested with Raspberry Pi model B running fresh Raspbian-wheezy 2015-02-16 release.
More information like supported AT command reference board schematics etc. can be found in http://www.simcom.ee/modules/gsm-gprs/sim900/ and http://imall.iteadstudio.com/wireless/gsm-gprs-and-wifi/raspberry-pi-gsm-add-on.html
Feel free to add useful ideas what else can be done with that add-on as comments to this topic (which will need approval from me before being published to minimize spam). Interesting parts could be using SIM900 for sending and receiving SMS, incoming / outgoing data connections, increasing baud rate and more.
If you found something in this page useful, consider donating or say thanks by clicking on the banners.
Hi,
I am trying to use the GSM Add-On for the RPi, but have had limited success. I\’m not sure, but I think the fact that I can\’t successfully complete your tasks is due to one of two potential problems: 1) I am using a SIM card that is still locked to a provider, e.g. there is a SIM PIN that I can\’t remove; 2) Improper setup or initial configuration of the SIM900 chip (tried to set the APN with a call to \”AT+CGDCONT\”). Any advice that you would give is greatly appreciated.
Best Regards,
Warren
Sir, I just bought RPI GSM Add on with Raspberry pi controller. I want to send txt sms to my mobile phone using Rspberry pi with RPI GSM ADD on. How can I do it…Please help me.
hey ….! help me to connect gsm modem to raspberry pi
how to do serial programming on pi
I completed 1b above.
I also attempted 2 from above but I did not have ttyAMA0 in cmdline.txt file.
I am getting the following error message:
sudo ./poweronoff.py
Traceback (most recent call last):
File \”./poweronoff.py\”, line 66, in
agsm.open()
File \”/usr/lib/python2.7/dist-packages/serial/serialposix.py\”, line 271, in open
raise SerialException(\”Port is already open.\”)
serial.serialutil.SerialException: Port is already open.
Any help would be much appreciated.
Eric,
You can modify the poweronoff.py to try to open the port and pass if it\’s already open.
try:
agsm.open()
except:
pass
of course it\’s good to find out why it wasn\’t closed earlier.
Best regards,
Roel